
Ragi roti or soft ragi rotti or Ukkarisida ragi rotti is an extremely healthy roti that needs very less oil.
This ragi roti is done by steaming ragi flour and kneading it to form a smooth dough. This is further rolled to make roti/rotti.

As many of us know, Ragi / Finger Millet is one of the healthiest whole grains that is grown and consumed in various regions of India and in a few other countries too.
It is considered a whole grain as all three parts of the kernel- the bran, germ, and endosperm are retained.
Hence, this is dense in fiber and all the other nutrients which are not lost during processing.
Being one of the staple food of Karnataka, it is included in our diet in various forms like Ragi Mudde, Ragi Ambli, Ragi Ganji, Ragi Dosa, Ragi Rotti /roti, Ragi Hurihittu, to name a few.
Ragi is highly nutritious and has varied health benefits. So, don’t you think it is high time to embrace this super grain and stock some in your pantries, if you haven’t, yet??

How to make ragi roti / soft ragi rotti?
This method of making soft ragi roti or rotti is done by steaming ragi flour and kneading it well to form a smooth chapathi-like dough. It is further rolled and cooked on tawa like chapathi or on direct flame like phulka which will easily puff up.
All it takes for this is a handful of ingredients, a couple of minutes and your arm strength to mix the cooked flour thoroughly, so as to avoid lumps. The initial steps are pretty much the same as that of ‘Ragi Mudde / Ragi Ball’ but, the dough consistency is a bit stiffer than that of ragi mudde. The dough is then divided to equal sized balls and rolled to make roti.
This yields a plain, soft roti that can be packed for lunch box as well, as it remains super soft for hours. As ragi flour is primarily steamed here, this is called ‘Ukkarisida Ragi Rotti’ or also called ‘Ragi Ubbu Rotti’ (in Kannada) as it puffs up.

A bit of ghee smeared on hot roti served with this ‘Badanekayi Shenga Palya | Eggplant Peanut Dry Sabji’ is definitely a lip-smacking combo.

So, let us move on to the recipe, shall we?
NOTE: 1 cup= 250ml

Soft Ragi Rotti
Ingredients
- 1 cup ragi flour - + more for dusting
- 1 cup water
- 1 teaspoon salt
- 2 teaspoons oil
- ghee - to spread on roti (optional)
Instructions
- Into a thick bottom pan, add water, salt, 1 tsp oil, and bring this to a boil.
- Once the water starts boiling, pour the ragi flour to the center of the pan. Leave it as it is for 3-4 minutes. You will see the water simmering and rising over the flour.
- At this point, gently make 4-5 holes on the poured ragi flour, to help it get cooked evenly. Cover this with a lid and leave it untouched for 6-8 minutes in low-medium heat.
- Now, switch off the stove, and mix the cooked flour thoroughly using a wooden stick or the round bottom of a wooden spatula. (refer notes 1)
- Once you have mixed this well, cover a lid and keep it aside for a few minutes, so that it cools down a bit.
- When it is warm, transfer this onto a plate and knead well. You can dip your fingers in water to handle the warm dough, but make sure to not make the dough watery.
- Keep kneading by further adding a tsp of oil and breaking lumps, if any. This can take 5-8 minutes.
- Finally, you should be able to get a soft, lump-free, non-sticky dough. (refer notes 2) Divide this into equal-sized balls and keep them aside.
- Dust a ball with some ragi flour and roll it using a rolling pin just like how we roll chapatis.
- You may dust more flour if required, but try to avoid it as this can cause the roti to dry up. Be gentle while rolling and do not apply pressure on it as it will be very smooth and can crack easily.
- Cover the rest of the balls with a lid while rolling a roti, so that they do not dry up.
- Heat a tawa and place a rolled roti carefully. Flip and cook well on both sides. Use a wet napkin to gently press the roti so that it doesn't dry up and to also remove extra flour used for dusting. Alternatively, you can cook it on direct flame.
- You may apply some ghee or oil in between, which is completely optional. Once you see that the color of the roti has changed slightly, it is done. Do not wait for it to turn dark as this can slightly harden the roti. Immediately, put it into a hot box or place it on a plate covered with a lid, so that it stays soft for hours.
- Continue to roll the rest of the balls into roti and cook them all similarly.
Notes
- A wooden stick (called 'Mudde Kolu' in Kannada) or the round bottom of a wooden spatula is preferred to mix the flour, as this is how it is done traditionally, to form a lump-free dough and this is how I have learned from my mom. If not, you can simply use a spatula.
- After kneading the dough, if you find it to be sticky, sprinkle some ragi flour and knead it further. If you find it hard, sprinkle some warm water and knead it further.
- As the consistency of the dough may depend on the quality of ragi flour used, start with 1 cup ragi flour: 1 cup water initially, alter it further if required, following the previous note.
- You can dust the balls with either ragi flour or wheat flour.
[/recipe]
Method to Prepare Ragi Roti | Soft Ragi rotti | Ukkarisida Ragi Rotti with Stepwise Pictures
Note- 1 cup= 250ml
1. Take a thick bottom pan, add water, salt, 1 tsp oil into it and bring this to a boil.
-

- Pour Water
-

- Add Salt
-
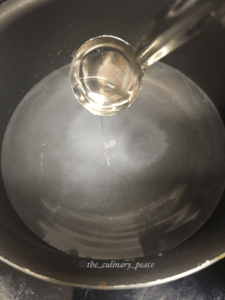
- Add Oil
2. Once water starts boiling, pour the ragi flour into the center of the pan. Leave it as it is for 3-4 minutes. You will see the water simmering and rising over the flour. At this point, gently make 4-5 holes on the poured ragi flour, so as to help it get cooked evenly. Cover this with a lid and leave it untouched for 3-4 minutes in the low-medium heat.
-

- Pour Ragi Flour
-

- Mix thoroughly using a wooden stick
3. Now mix everything thoroughly using a wooden stick or the round bottom of a wooden spatula. Let this get cooked for another 3-4 minutes on low heat. Once this is well cooked, switch off the heat and cover a lid and keep it aside for a few minutes, so that it cools down a bit.
-
- Mix thoroughly using a wooden stick
-

- Mixed Well
-

- Cover with a lid and keep it aside
4. When it is warm, transfer this onto a plate and knead well. You may dip your fingers in water to handle the warm dough, but make sure to not make the dough watery. Keep kneading by further adding a tsp of oil and breaking lumps, if any. This can take 5-8 minutes.
-

- Knead well
-

- Add 1 tsp oil and knead further
5. Finally, you should be able to get a soft, lump-free, non-sticky dough. Divide this into equal sized balls and keep them aside. Remember the consistency of this dough is stiffer than that of ragi mudde, as you have to roll this into roti.
-

- Soft dough
-

- Non-Sticky
-

- Make equal sized balls
6. Dust a ball with some ragi flour and roll it using a rolling pin just like how we roll chapathis. You may dust more flour if required, but try to avoid it as this can cause the roti to dry up. Be gentle while rolling and do not apply pressure on it as it will be very smooth and can crack easily.
-

- Dust some ragi / wheat flour
-

- Roll it
-

- Crack-free rolled rotti
7. Heat a tawa/pan and place the rolled roti carefully. Flip and cook well on both sides. Use a wet kitchen napkin to gently press the roti so that it doesn’t dry up and to also remove extra flour used for dusting. Alternately, you can cook it on direct flame like how we cook phulkas.
-

- Place on hot tawa
-

- Gently press it with a wet napkin
-

- Puffs up
8. You may apply some oil or ghee in between, which is completely optional. Once you see that the colour of the roti has changed slightly, it is done. Do not wait for it to turn dark as this can slightly harden the roti.
-

- Apply oil
-

- Cooked well
9. Continue to cook the rest of the rolled roti. Stack the roti in a casserole or place them on a plate covered with a lid or serve immediately with Eggplant Peanut Sabji (Badanekayi Shenga Palya).
I hope you give this recipe a try and enjoy it as much as I enjoyed preparing it and writing it down for you all. I would love to hear your feedback on this. When you try it, kindly post your valuable comments below or share it with me personally on Instagram / Facebook, or post it with due credits. You may also pin it on Pinterest.
